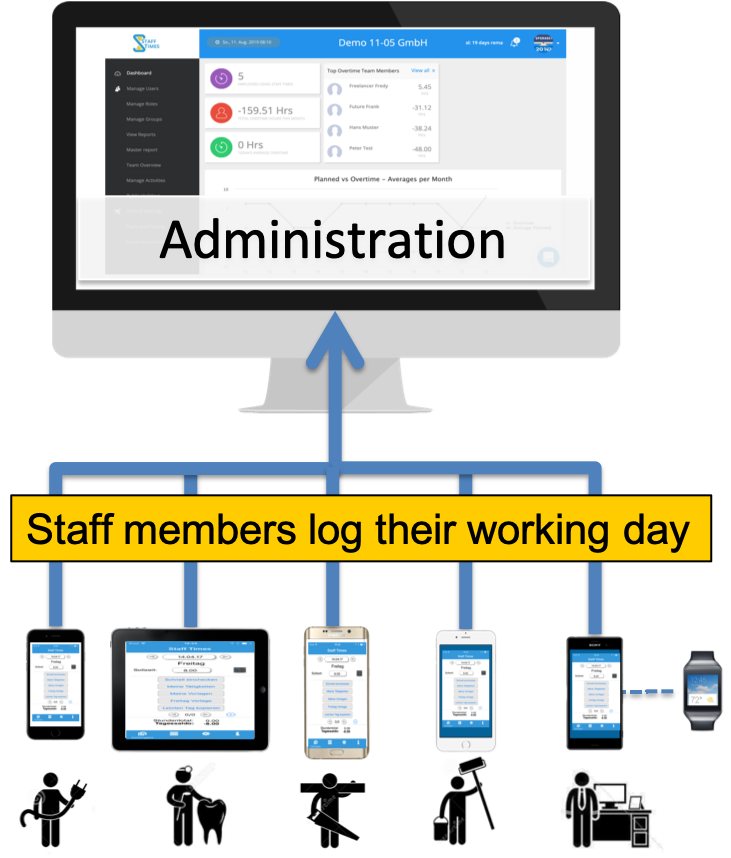
The Staff Times cloud solution consists of an administration center on the web, also known as the Admin panel, and a mobile app for your staff's time recording, also known as the My Time app. See below illustration.
Please log in to the admin panel and go through the default settings and update these to match your company’s environment.
The Admin Panel - let's get started
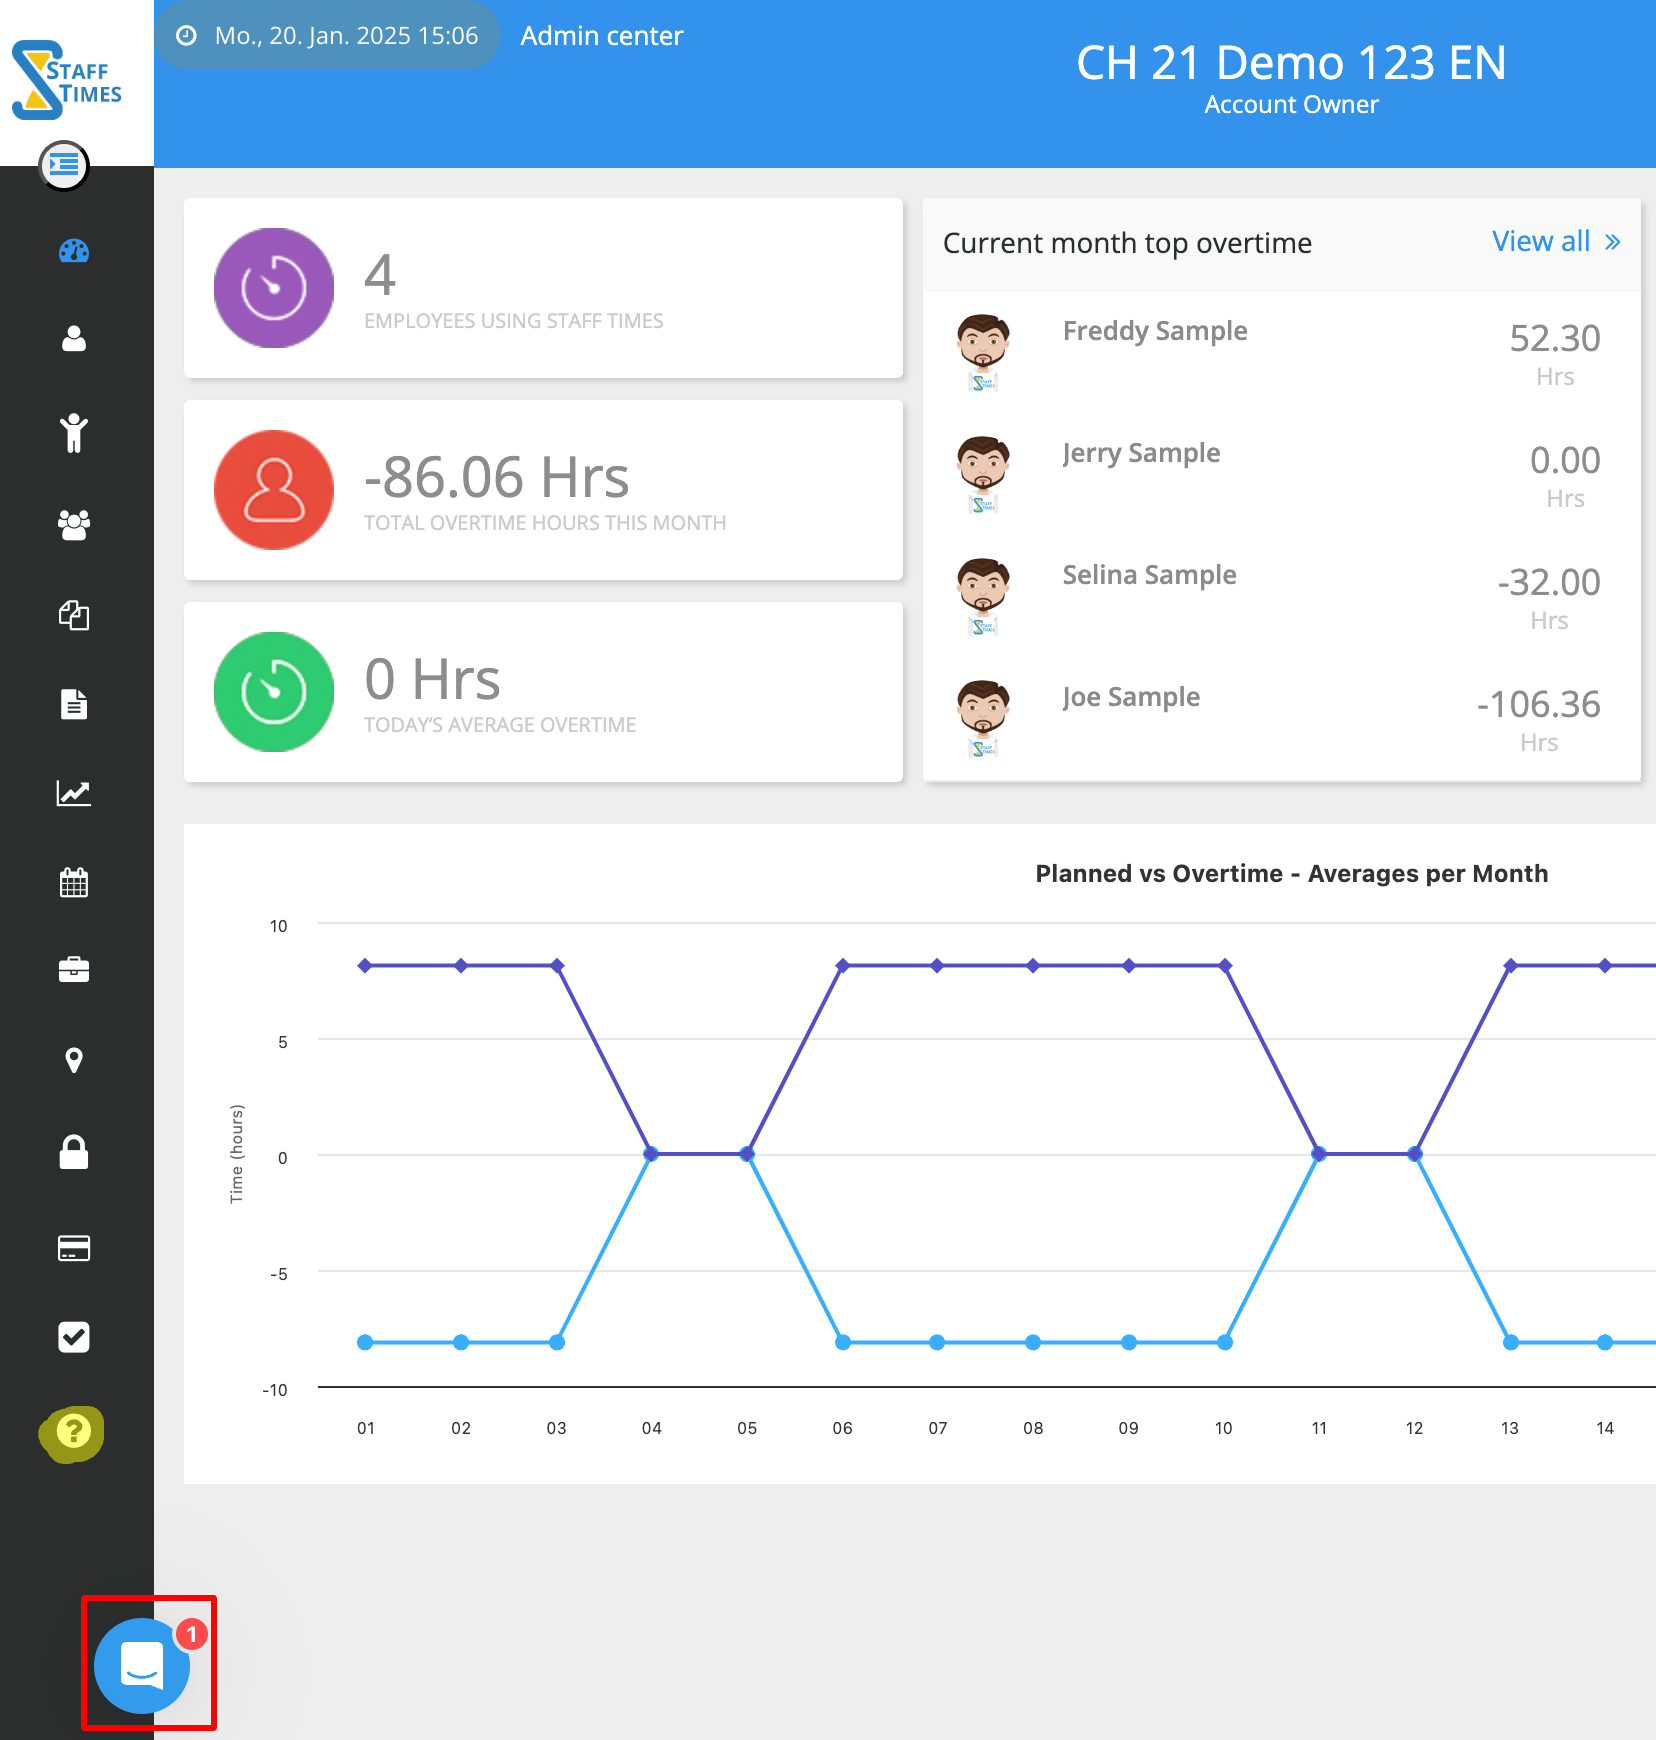
Once you have logged in you will land on the home screen named 'Dashboard' as illustrated below. Please take note of the In-App Messenger, where you can send us messages and look up many articles & guides with explanations to various features. Take advantage of the product tours to get to know the below sections. The In-App Messenger is located in the lower right corner of the screen, as shown below.
.png)
On the left side is the menu bar. We recommend that you click the left bar items and check the banner display to find a tutorial video provided.
The mobile app "My Time"
When you created your Staff Times account, you received an invitation email with your personal credentials for "Joe Sample". This allows you to download the mobile app from the App Store (iOS) or Play Store (Android). If you cannot find the email, please also check your spam folder. With the My Time app you can get to know the employee perspective and record your first timeshets as illustrated:

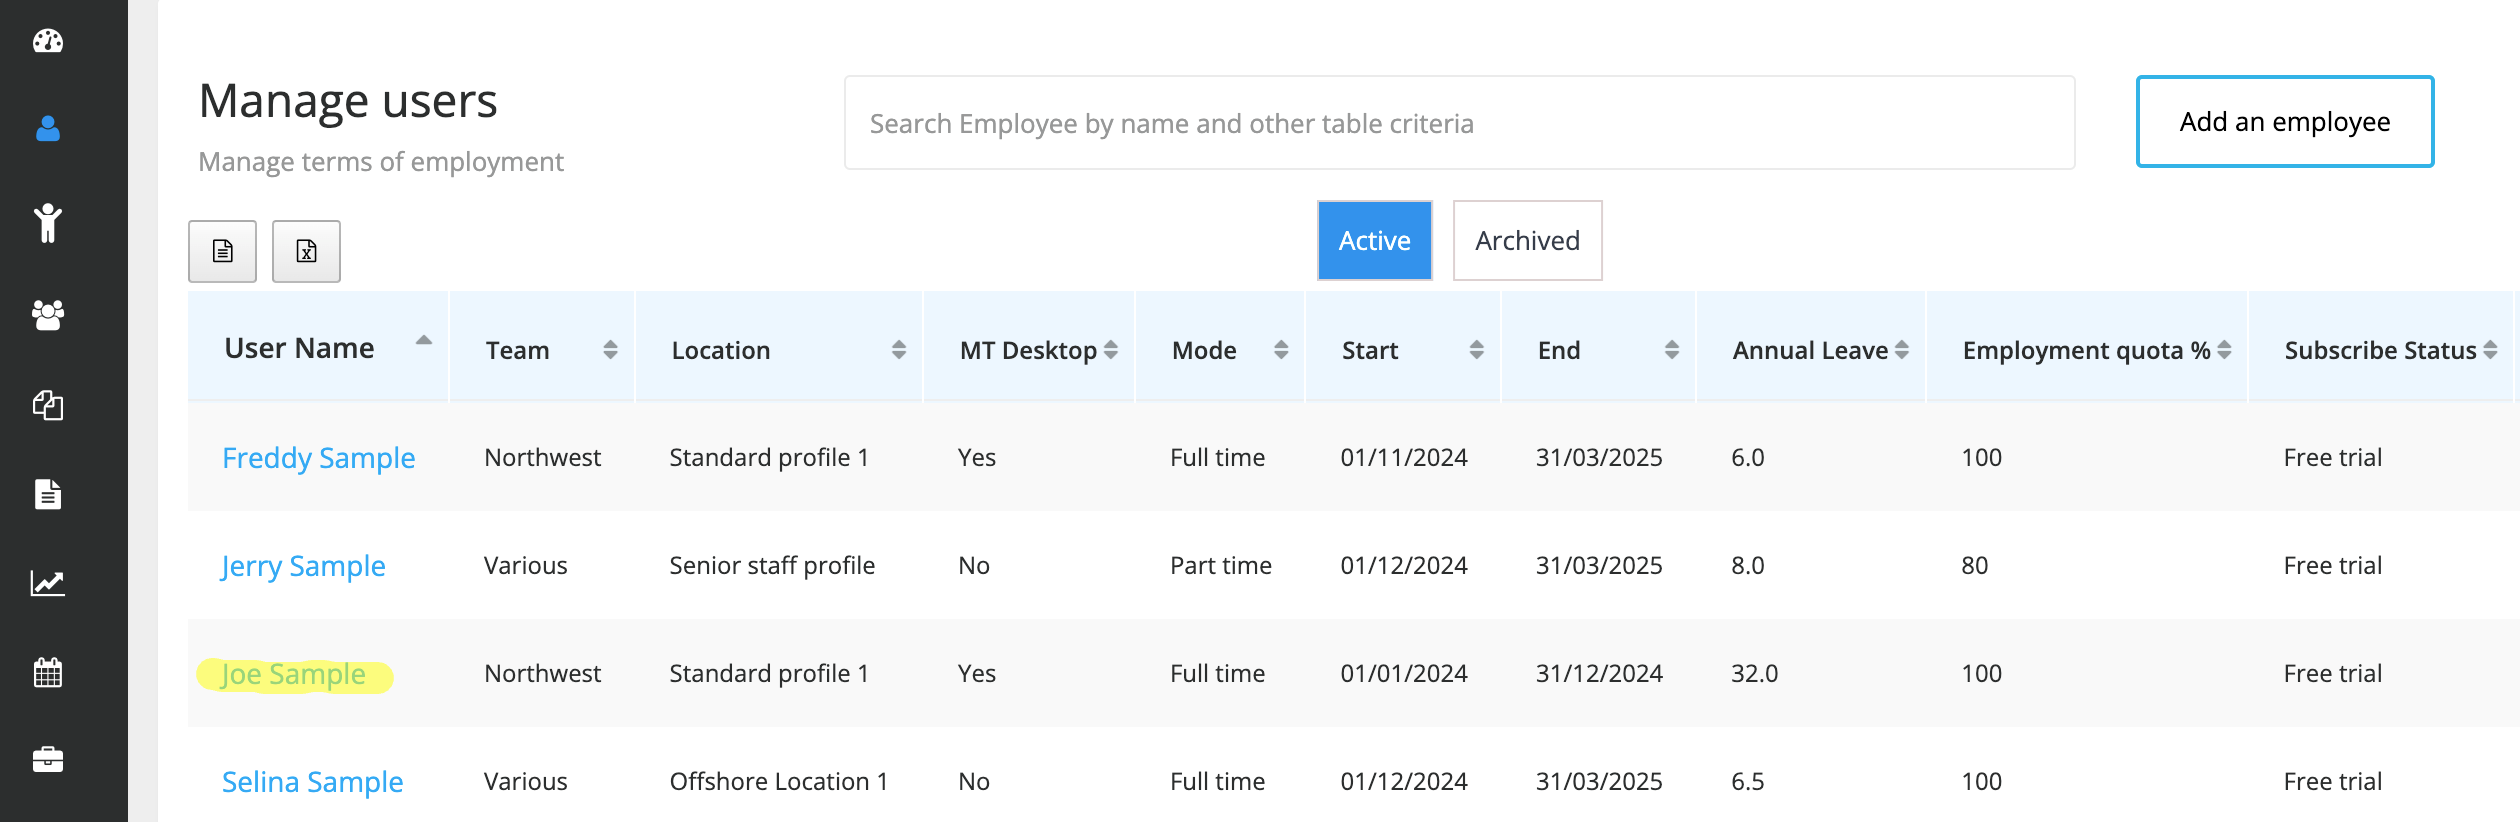
Manage users
A test user identified as "Joe Sample" has been set up for you, and an invitation email containing the access information for the My Time app has been dispatched to this user. You have the option to modify the user's name as needed. To accomplish this, navigate to the Manage users section in the left sidebar, then click on the name "Joe Sample" in the list view, as illustrated in the example below. This will guide you through the settings for the employee profile.
.png)
When you add an employee you are setting up the Terms of Employment for that user. Your user may be set up with tracking mode of 'Full-Time', 'Part-Time' or 'Basic'. Once you have gone through all screens and saved the employment profile the last step will trigger the invite mail with the personal credentials to your user.
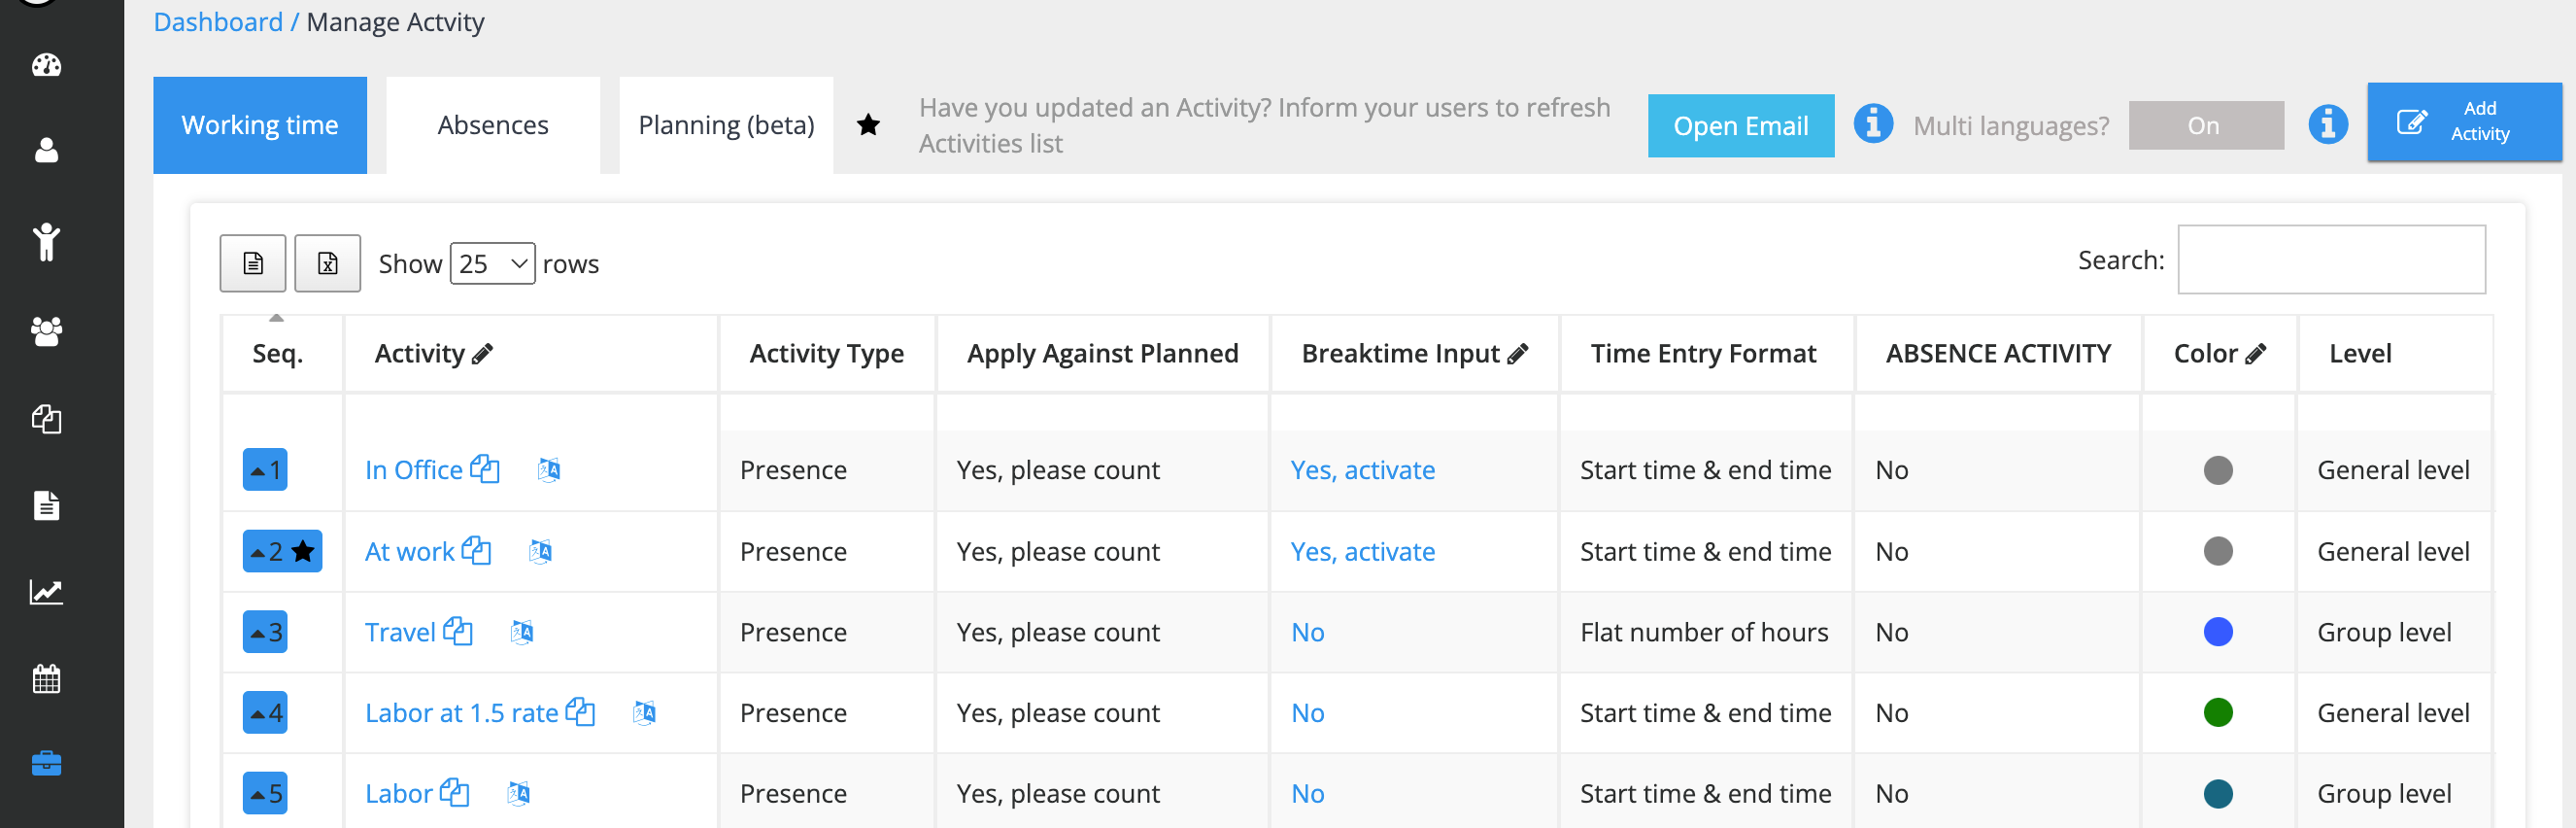
Manage Activities
Check the left-side Menu for Manage Activities. A default set of common Activity names have been created to get your started. These names will appear on the mobile app for your users for logging time. See the illustration.
.png)
The Activity names can be configured for use on three levels as follows:
-
Company: general access is given to all mobile app users company-wide.
-
Group: access is enabled for staff assigned to this group (default group 'Various'). This feature is used by companies that wish to track customer orders and project time against plan. Think about creating groups for projects and customers to which you would like to allocate Activity names for services provided.
-
To set up and assign your staff to a Role or Group check the left-side menu options for Manage Teams and Manage Groups. Would you like to allocate your services to specific groups like customers and projects? Would you like you to allocate teams to specific Activity names? then you might consider creating Teams.
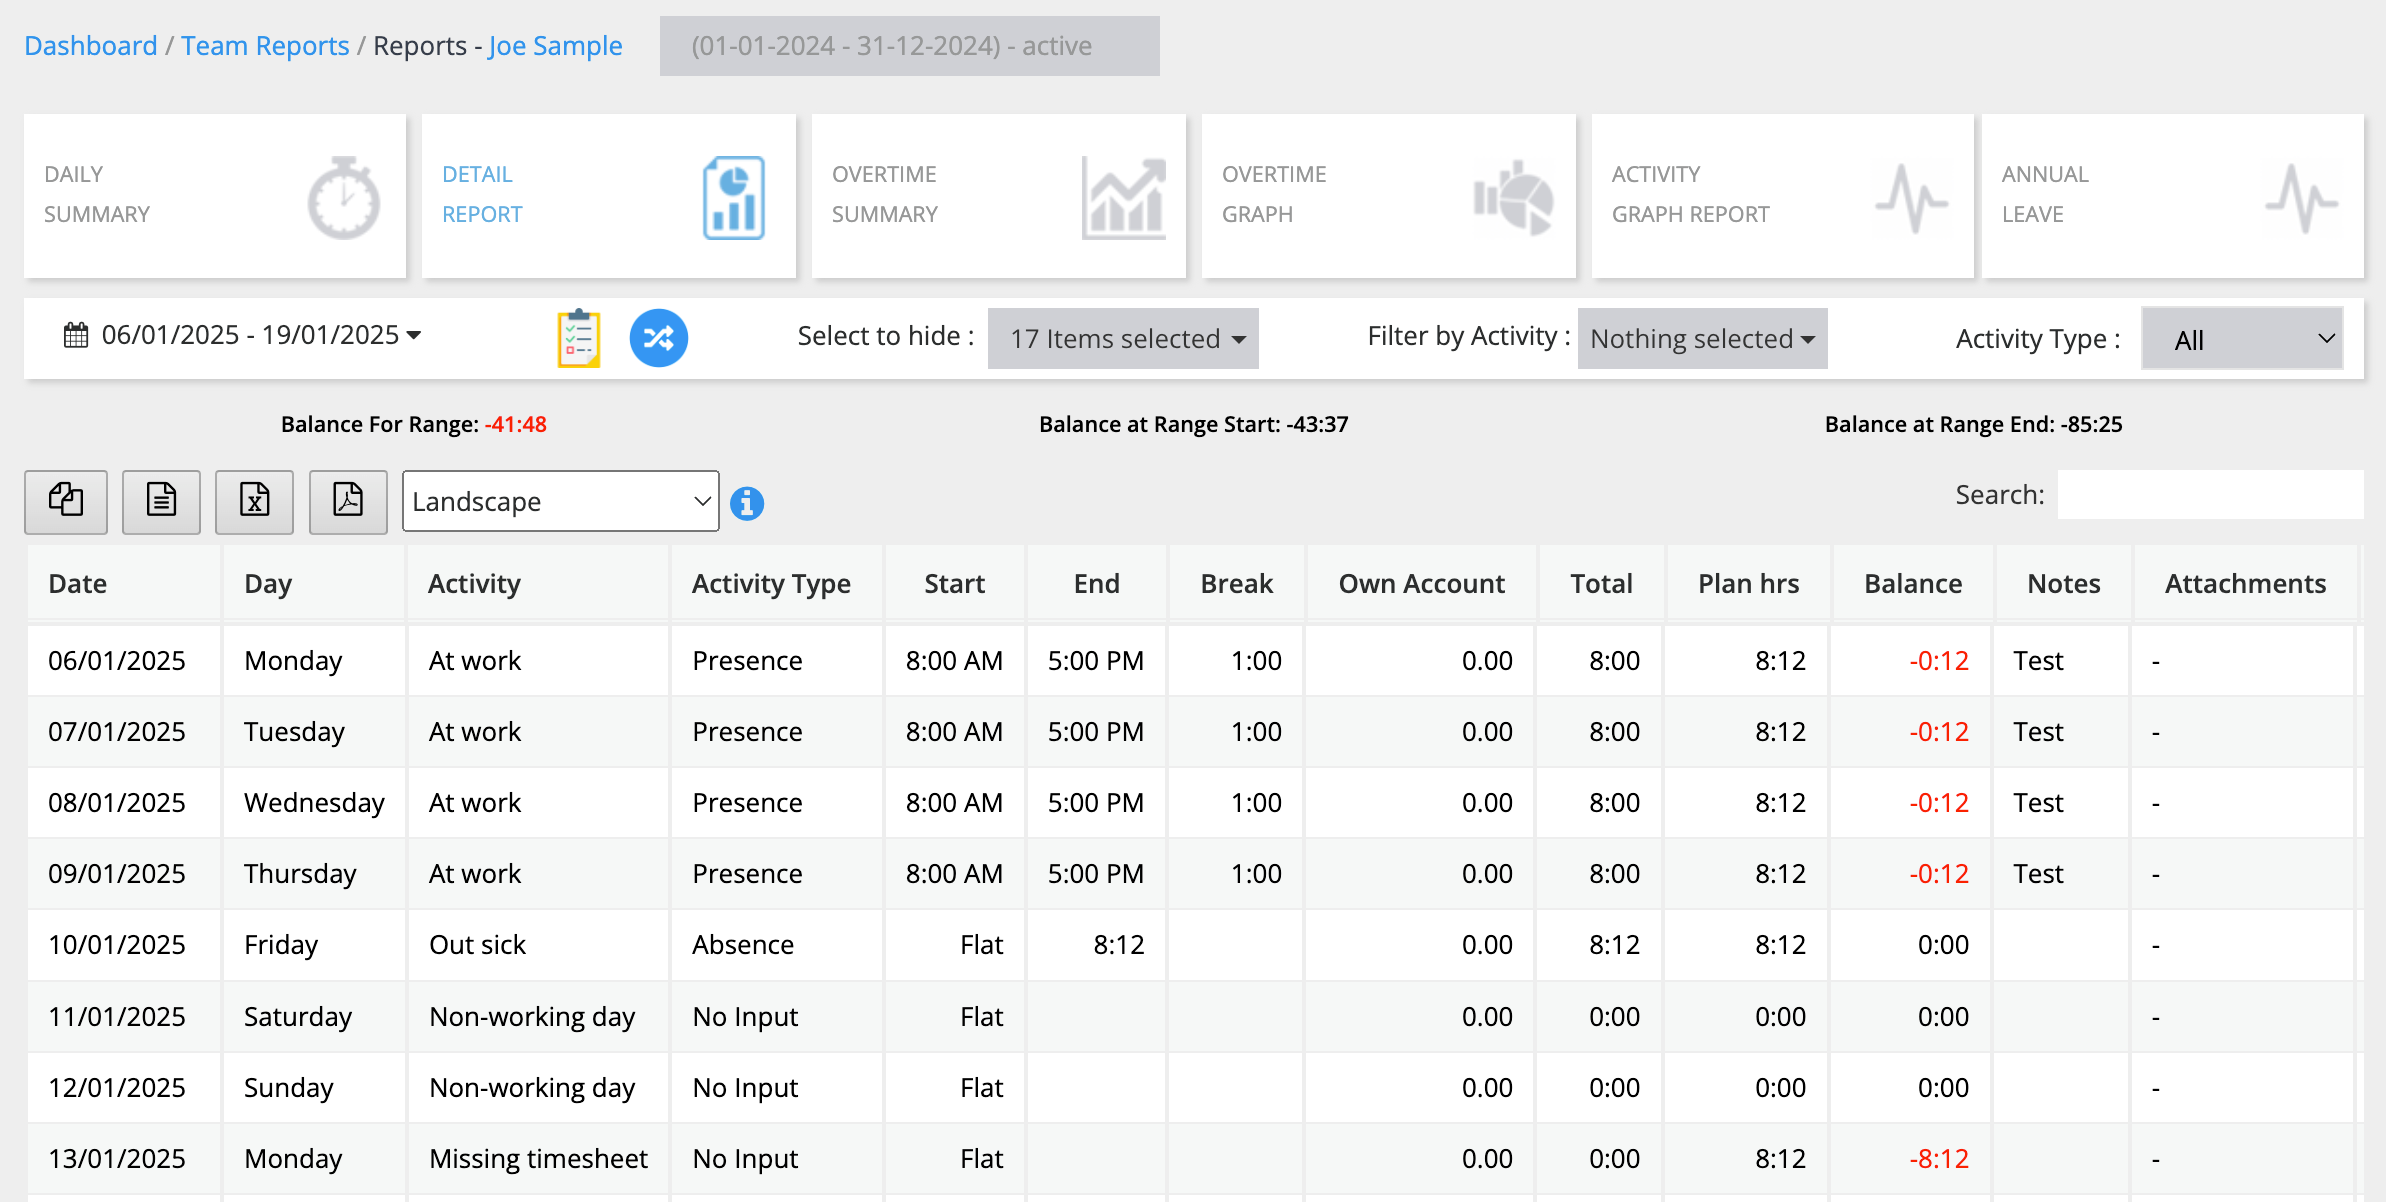
How to Review Logged Hours and Balances in Team Reports
Check the logged hours of your team through the sidebar option Team reports by selecting View reports and then going to Detail report. Compare attendance, leave, and overtime balances with the summary balances shown in the mobile app. Refer to the illustration:
.png)
Additional references & support
Please take note of the articles and tutorial videos provided in the in-app messenger and support page when you are logged in. Check these guides for Setting up your user - Terms of Employment and Setting up Activity names. Please use the messenger to clarify your questions with us.
In addition, we are happy to provide an on boarding training of Staff Times free of charge at your request. Please let us know. The Staff Times complete features are available to you for testing for one full month. If you wish to subscribe simply select the users you wish to subscribe in the subscriptions listing and follow these instructions.
We appreciate your interest in Staff Times. As part of a growing user community, congratulations for discovering Staff Times and welcome to the club!